4 Tier Diaper Cake Part 1
I'm going to break this one down into 2 possibly 3 tutorials. Wouldn't it be fun if I showed you a sneak peek of the finished product? Well, I can't do that! You'll have to wait & I hope you think it's worth it. Here we go....
A list of things you'll need:
10" cardboard cake board
Packing tape or other
2 paper towel tubes---you know the brown part---ha!
1 toilet paper tube--again same as Paper Towel roll
Hot glue gun & glue sticks or E6000
Scissors
Diapers
10" & 12" cake pans or spring form pans
Twine or string
Rubber bands
Ribbon
Lighter or Fray Check
Decorations: Onesies, Bath Towels, Hats, Rattles, Pacifiers, Books, Toys, Lotions, ETC...
I would like to begin by saying sorry for the quality of the pics. You get what ya get when you're working w/a cheap camera & an amateur. :) Also, no making fun of my fingers & hands. It's winter & I'm a nail biter. What can I say?!? Alright let's begin! First things first, making the cake stand & tiers. Make sure you have your hot glue gun plugged in & ready to go.
Step 1: Tape 1 paper towel tube to the toilet paper tube. I used masking tape because that's what I had on hand. I think packing tape is more durable.
Step 2: Find the center of your cake board & dab a circular bead of glue about the diameter of your new long paper towel tube & then attach the tube to the board. Wait for the glue to set (at least 1 minute).
Step 3: Tear off about a 6" strip of tape. Attach half to the tube & half to the plate. An easier way to do this is by cutting the bottom portion of the tape in 2. It will lay nicer that way. This step is very important because it will add extra support to anchoring your tube. You don't want this to come undone later in the project. TRUST ME! You'll repeat this all the way around the tube (usually about 6 strips total). Now you have your stand. Set it aside for now.
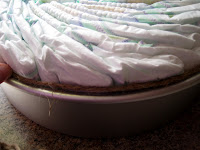
Step 4: Using your 12" inch pan, we'll make the first tier. For this tier, I used 32, size 4, Huggies, again because this is what I had on hand. You can use whatever size, brand, etc. Maybe even consult the Mommy To Be & see if she has a preference. Start placing them around the edge of the pan. Always placing your new one behind the old & overlapping about an inch. I face the front of my diapers toward the wall of the pan since I think it lays nicer. You can experiment w/this & do how you like.
It should start looking like this.
Once your diapers meet the first diaper, tuck the newly place one in front of the first. That's kind of hard to explain. I hope the picture helps. Then keep placing them till you have them all the way around the outer layer. Then straighten any that need it & shift them to work your opening to the middle. We don't want a lopsided cake!
Next make a "C" shape out of the diapers & fill in the opening leaving just enough space for the paper towel tube to slip in. Use as many as you see fit.
It should now look like this.
Step 5: Take your twine or string & lay it around the edge of the pan. You'll want a piece just big enough to tie around your tier. Then cut & snugly tie the twine around your tier. You don't want it to be too loose or you could end up redoing Step 4.
Here you just want to tuck your twine down into the pan. Go at least half way down (to the middle of diapers). Do this all the way around the tier. Again, we don't want those puppies coming undone!
Step 6: Take your stand & insert the tube into the opening of the cake. Then flip the cake & stand over letting the tier slip out of the pan & down the stand's tube.
You now have your first tier. Good job! Repeat steps 1-6 to make your 2nd tier, this time using your 10" pan. I used 20 diapers on my 2nd tier.
OK, I've gotta stop us here & conclude our first Wily Wednesday. We'll pick right up were we left off by making tier 3 & 4 & we'll also get started on some decor--the fun part! I hope you enjoyed this tutorial & will stop back by next week.


No comments:
Post a Comment